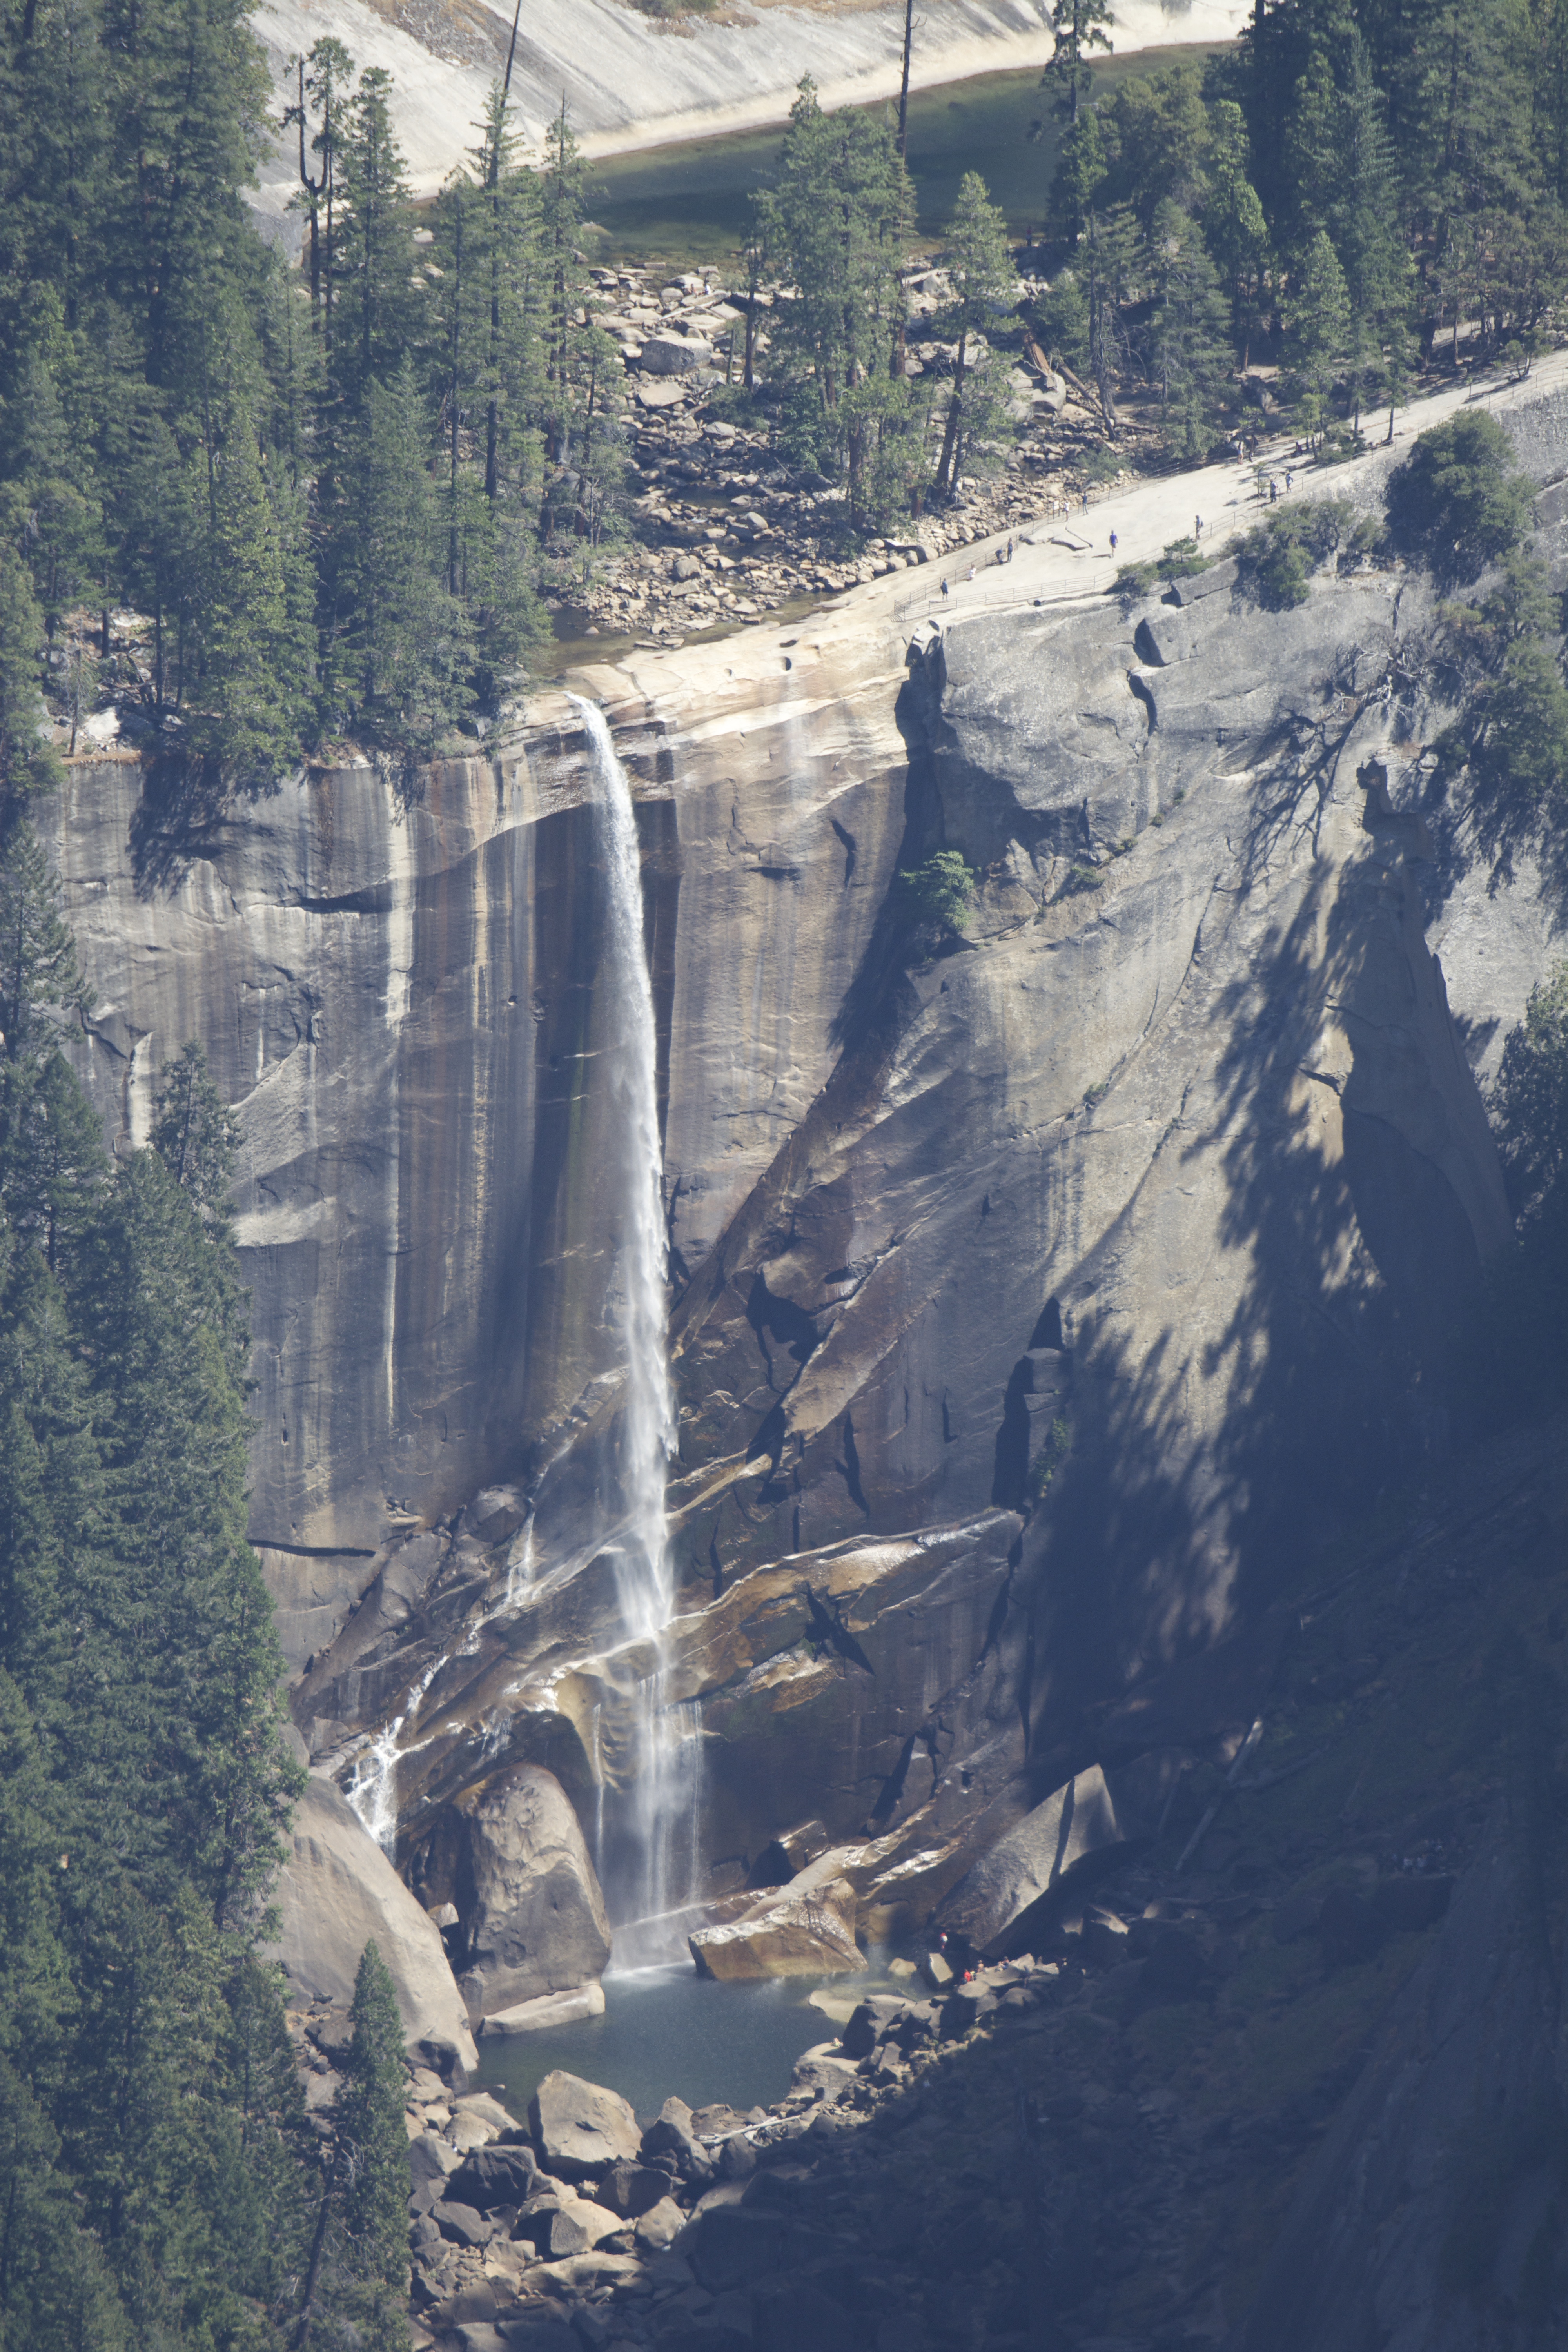
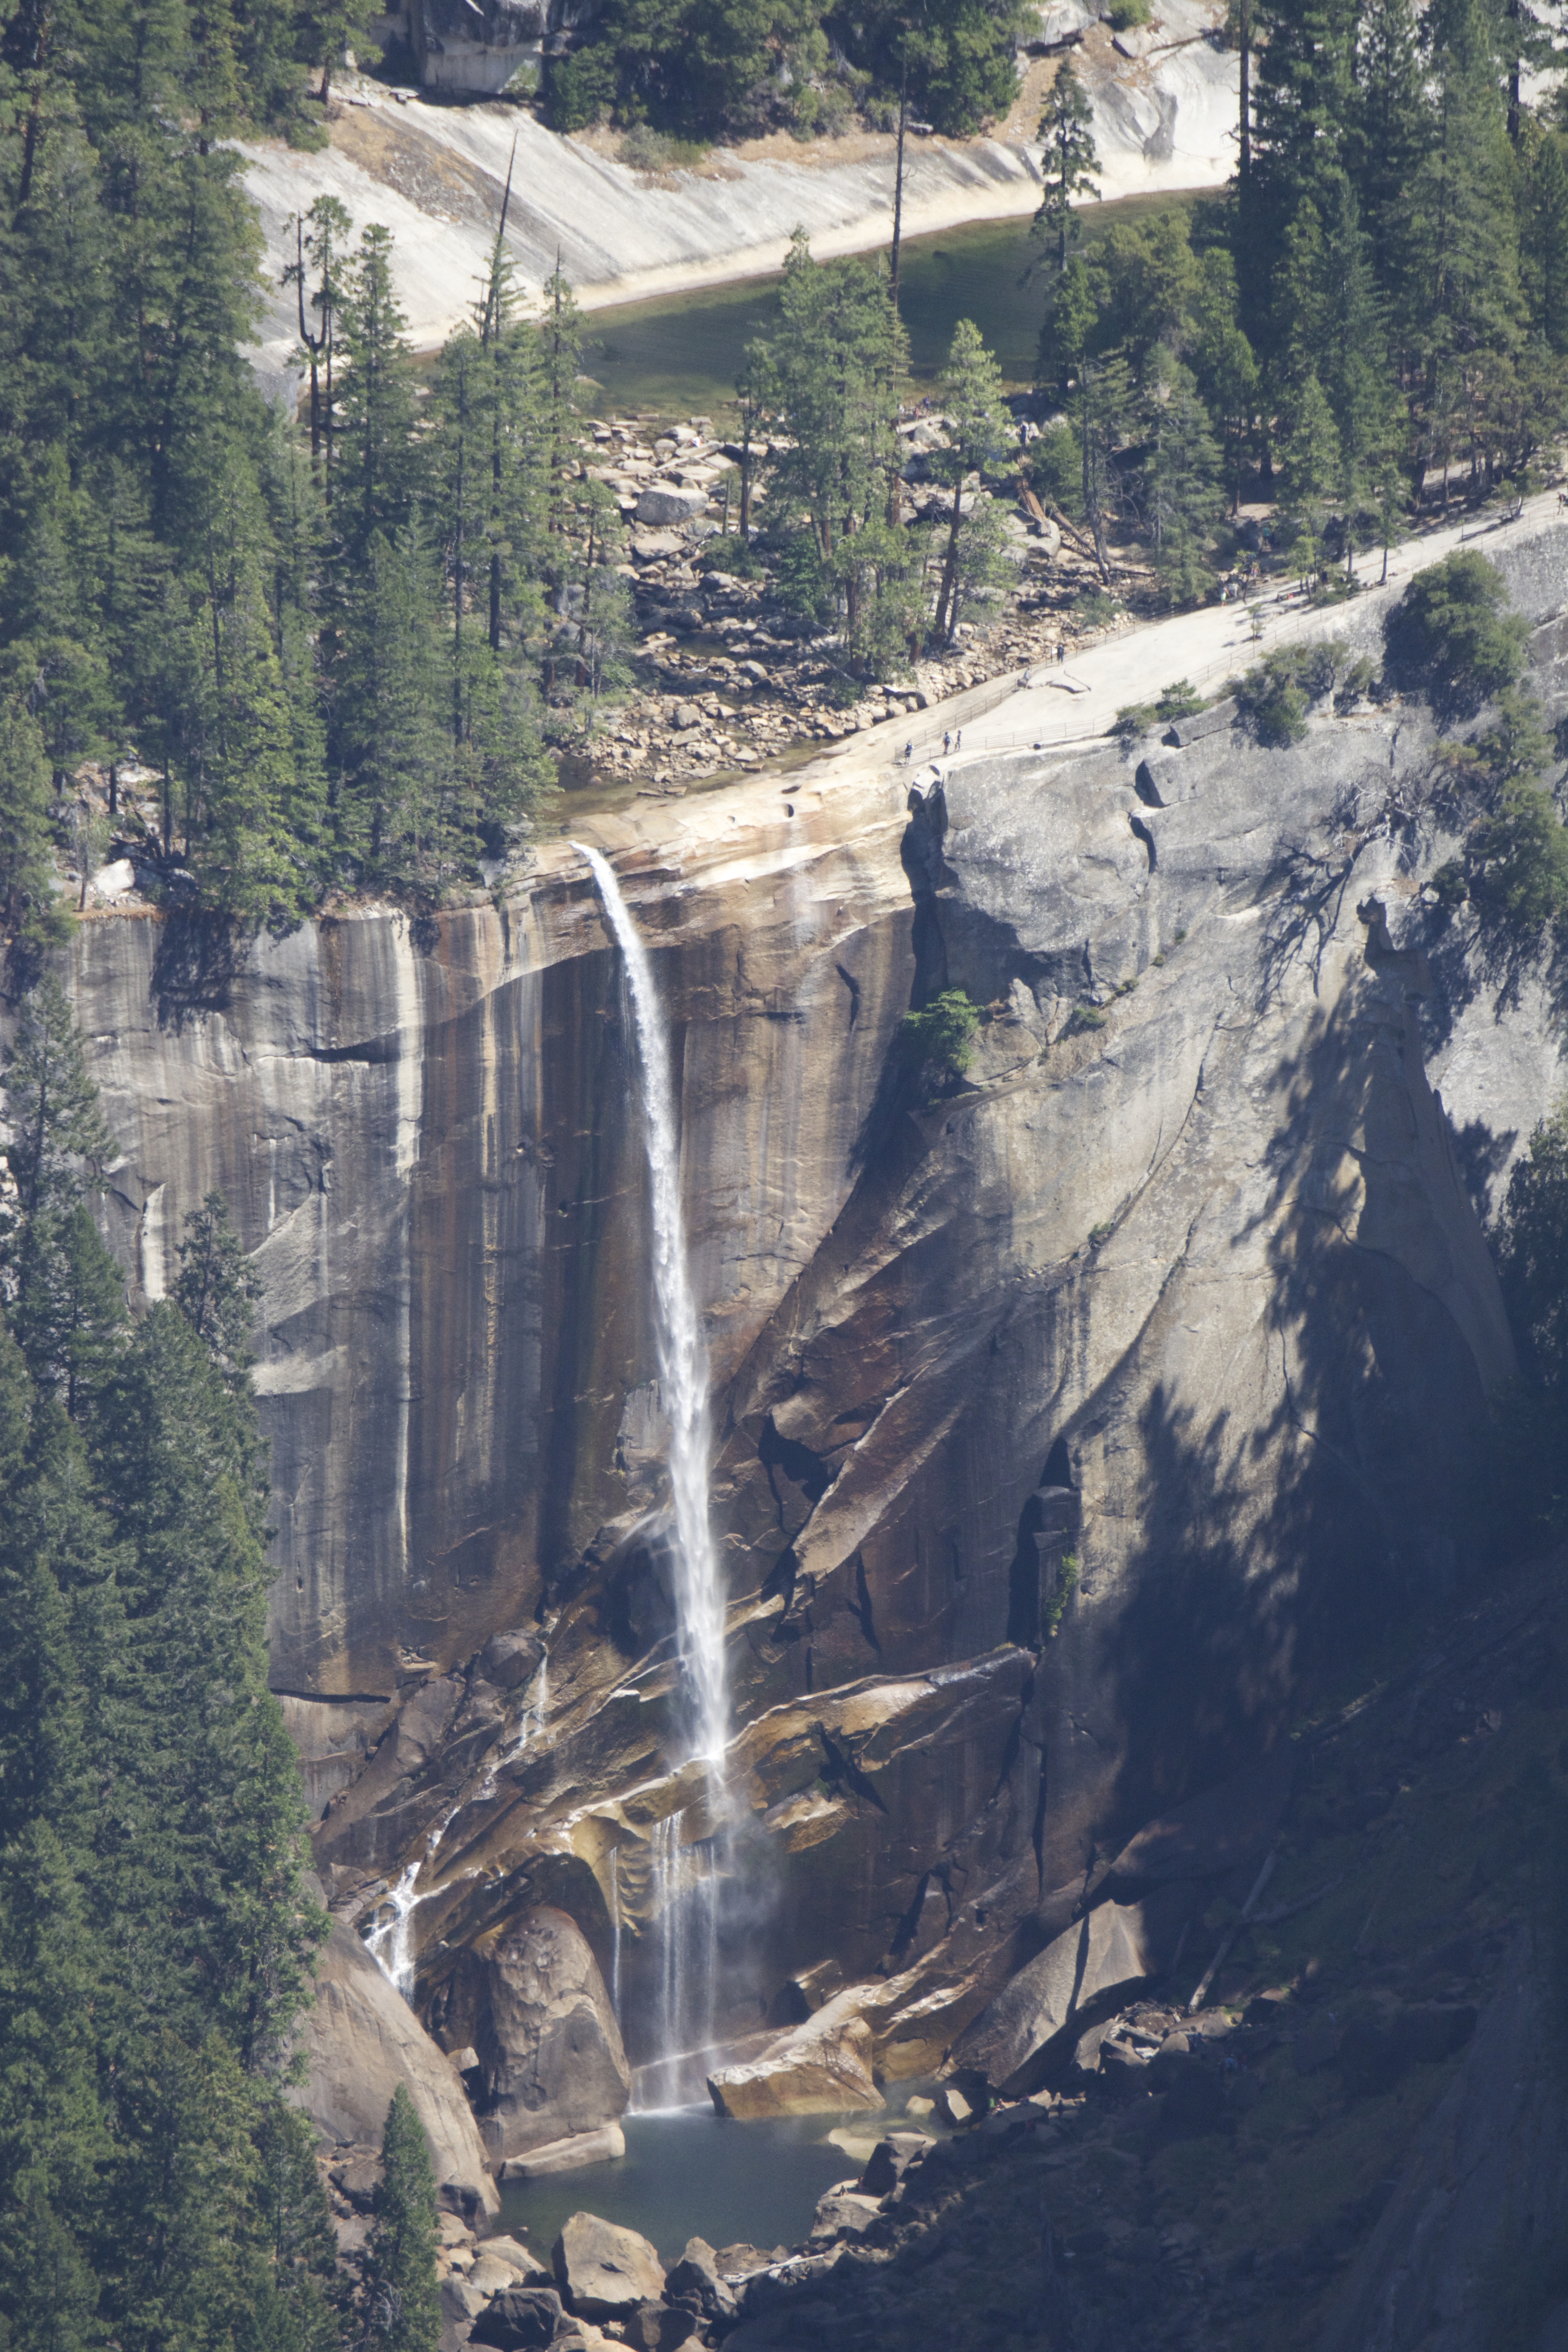
I like circular polarising filters. I hate glare, and I like strong – but natural – contrast. So until recently I used them a lot. The only downside, I figured, was the loss of light. Sometimes my photos using the filter seemed a bit soft, but I assumed that was because of the slower shutter speeds. It wasn’t until a recent trip to Yosemite that I realised something else might be wrong. Here’s three photos I took; can you spot the difference?
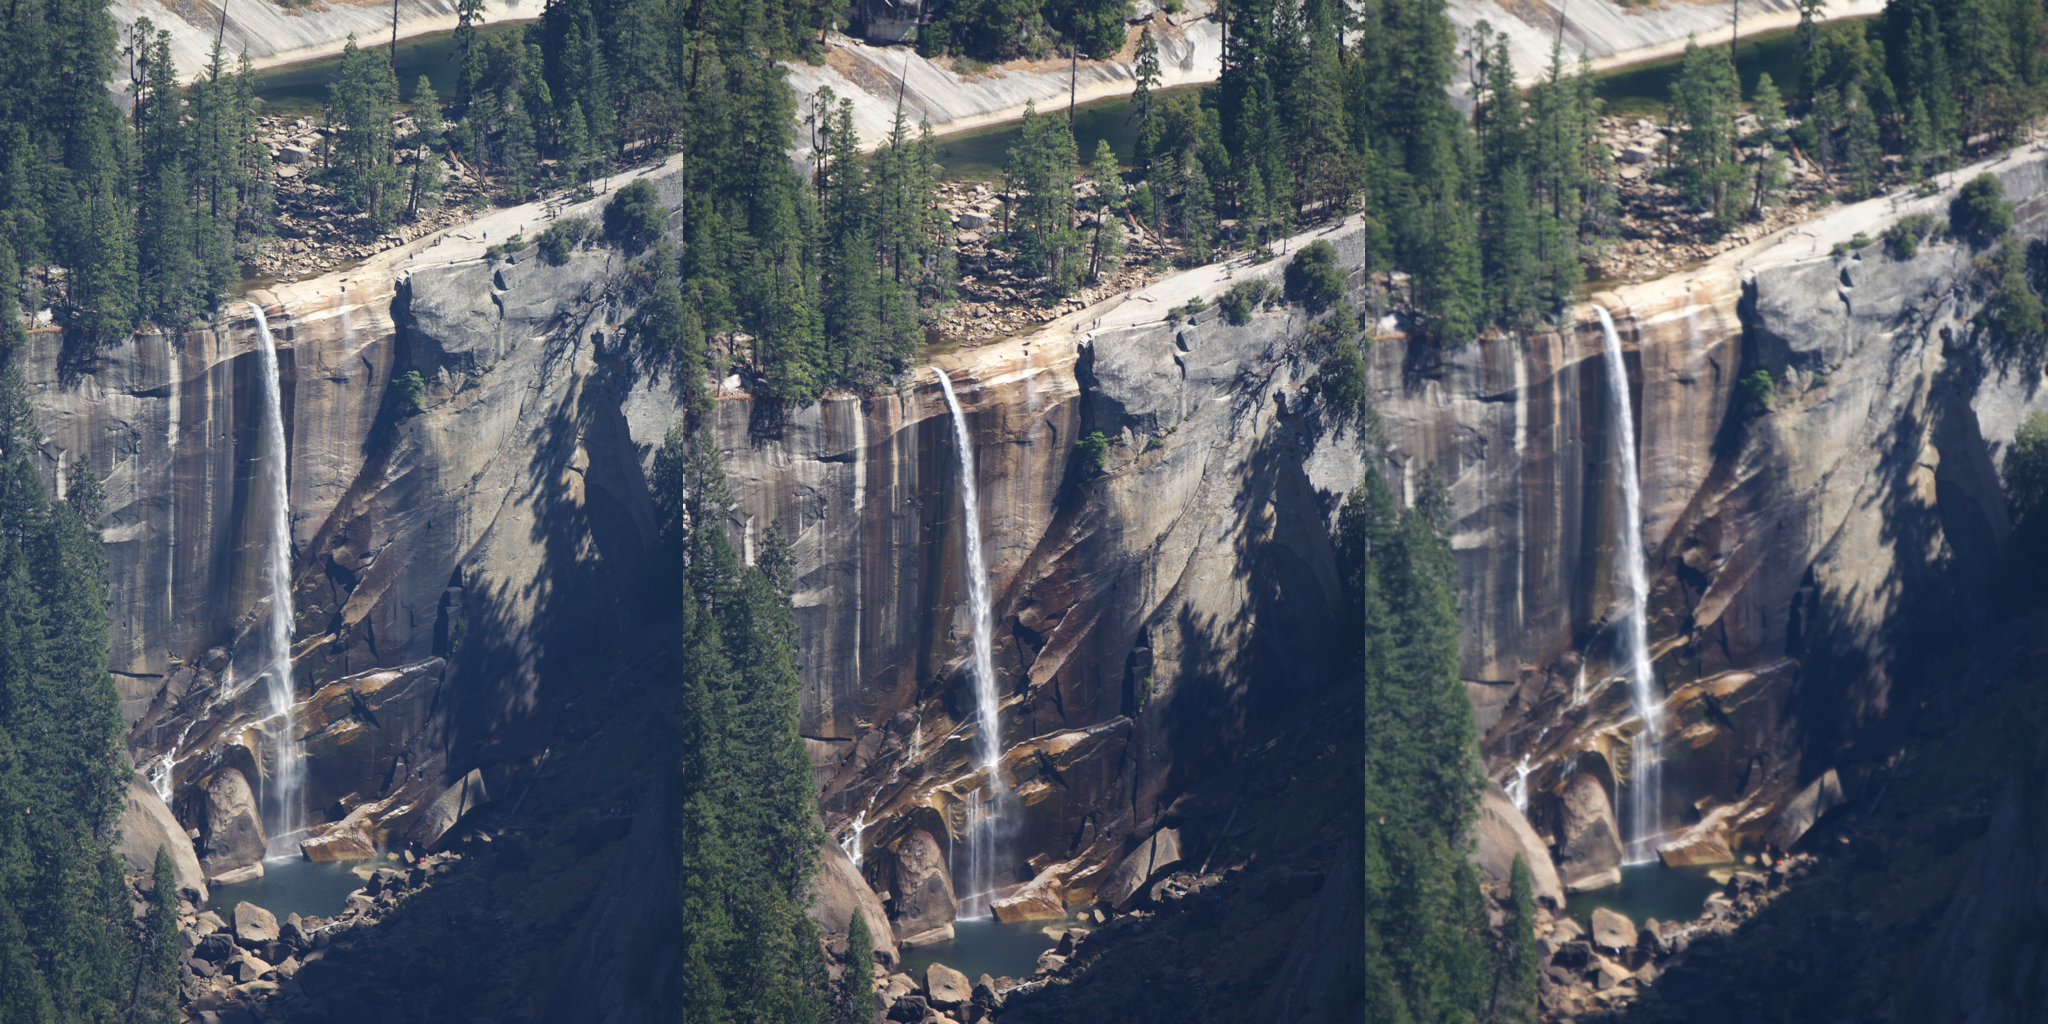
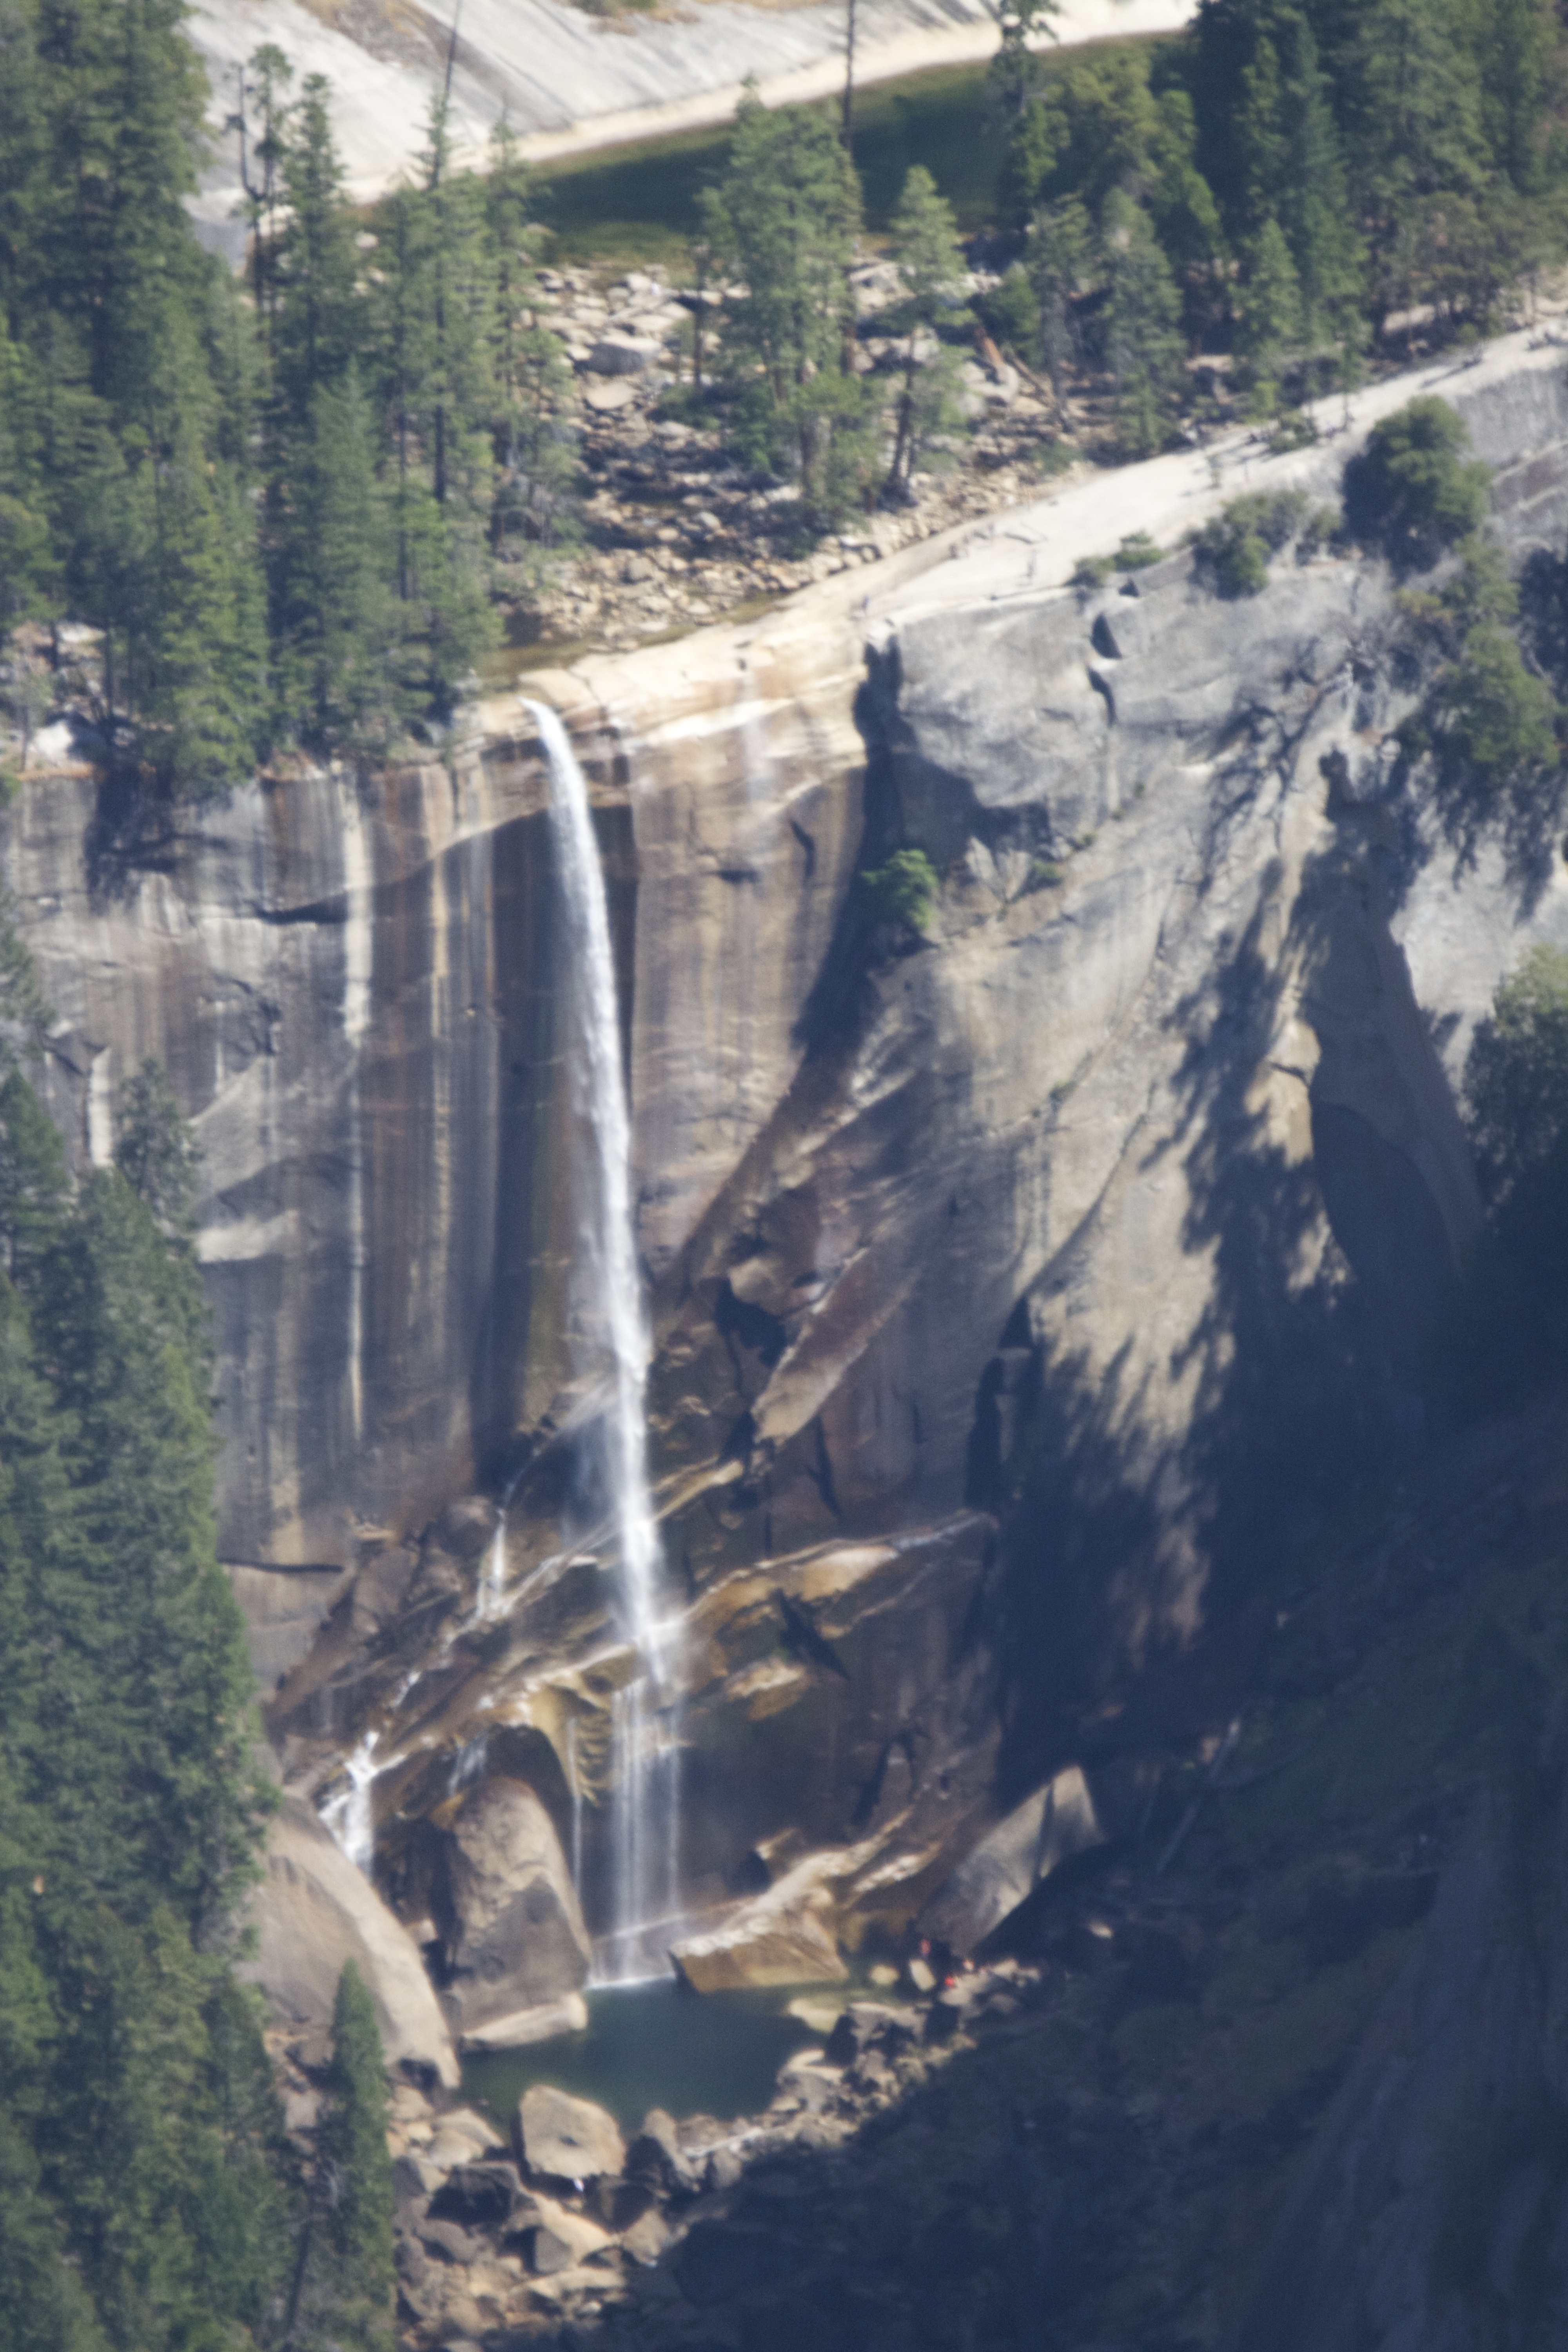
Hopefully you can see, even in this tiny preview, that at least one of these things is not like the others. I’ll give you a hint: two of these were taken with a circular polarising filter. Two different filters – a cheap ProMaster one and an expensive B+W Käsemann one. Hopefully, then, you can figure out which two were using the circular polarising filters and which filter is which. Here, I’ll help you out with a couple of 100% crops:
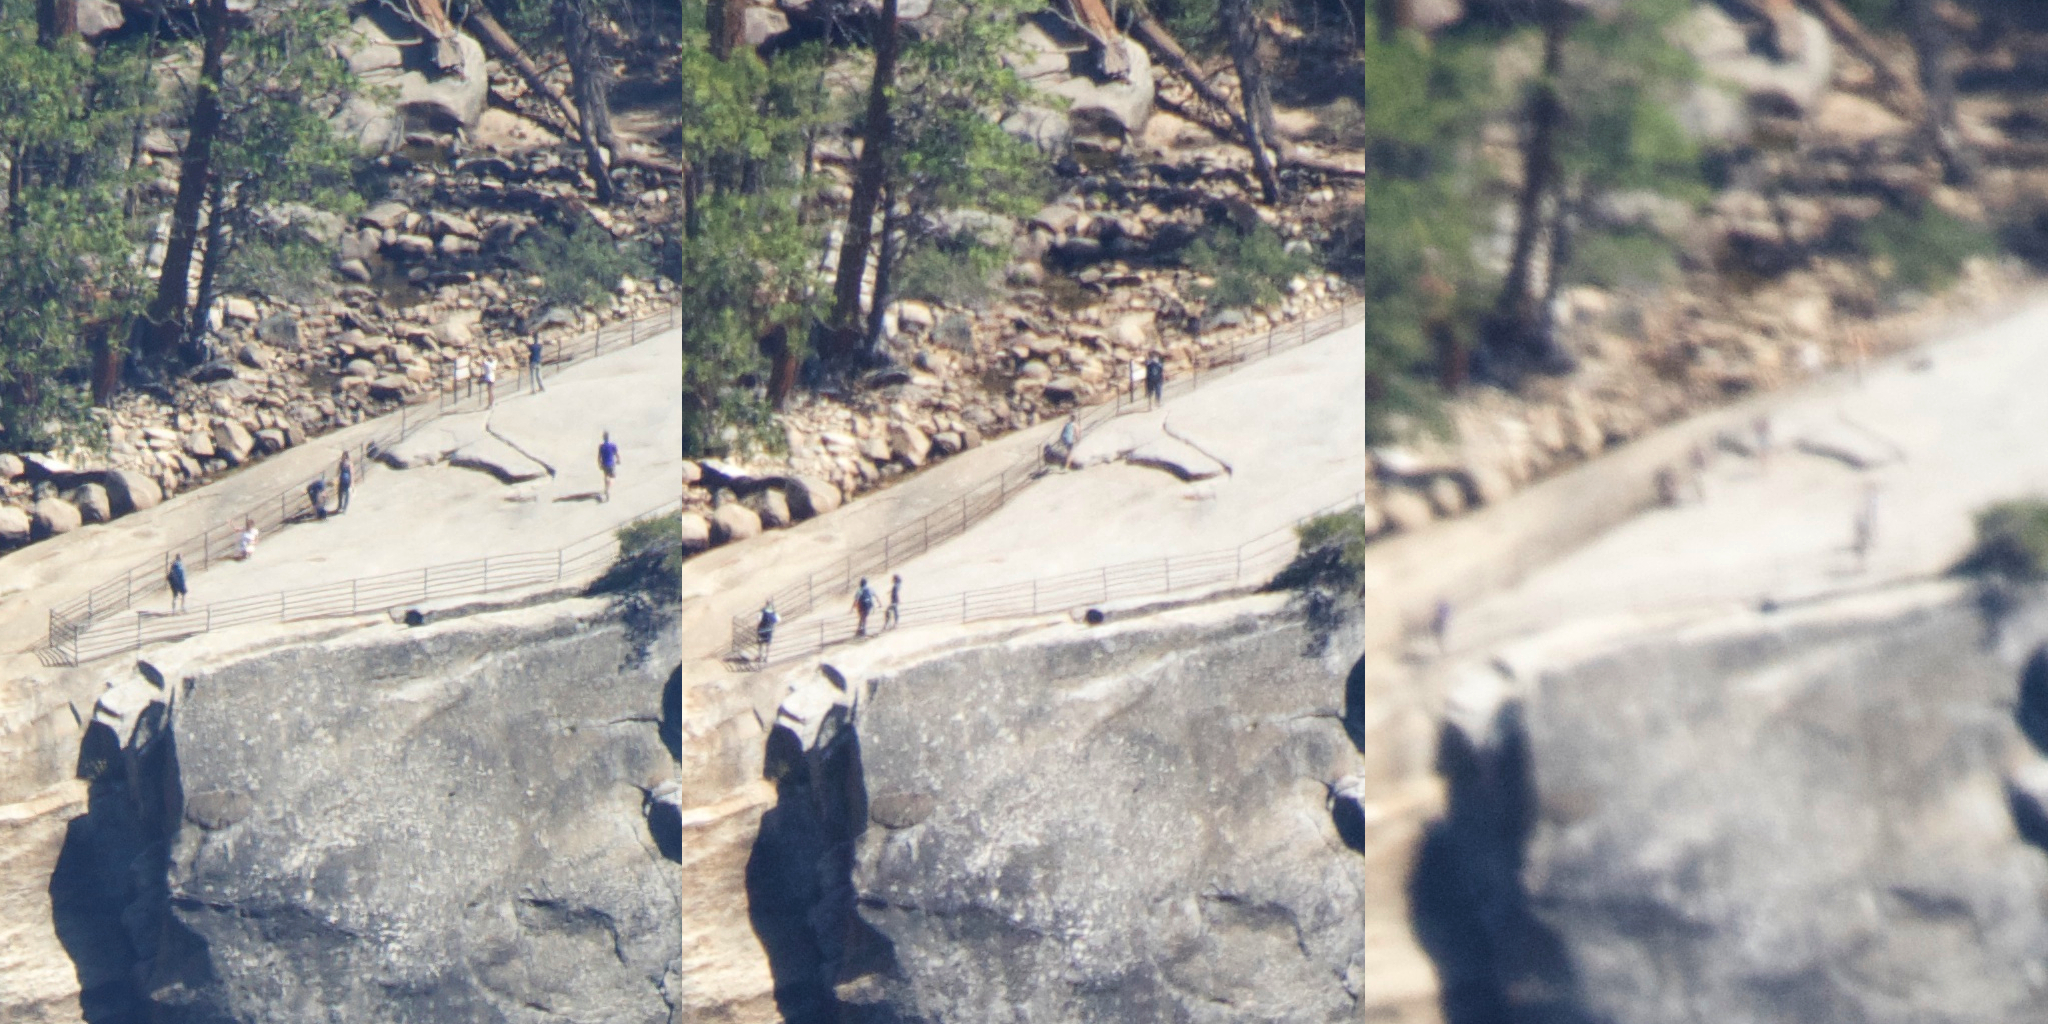
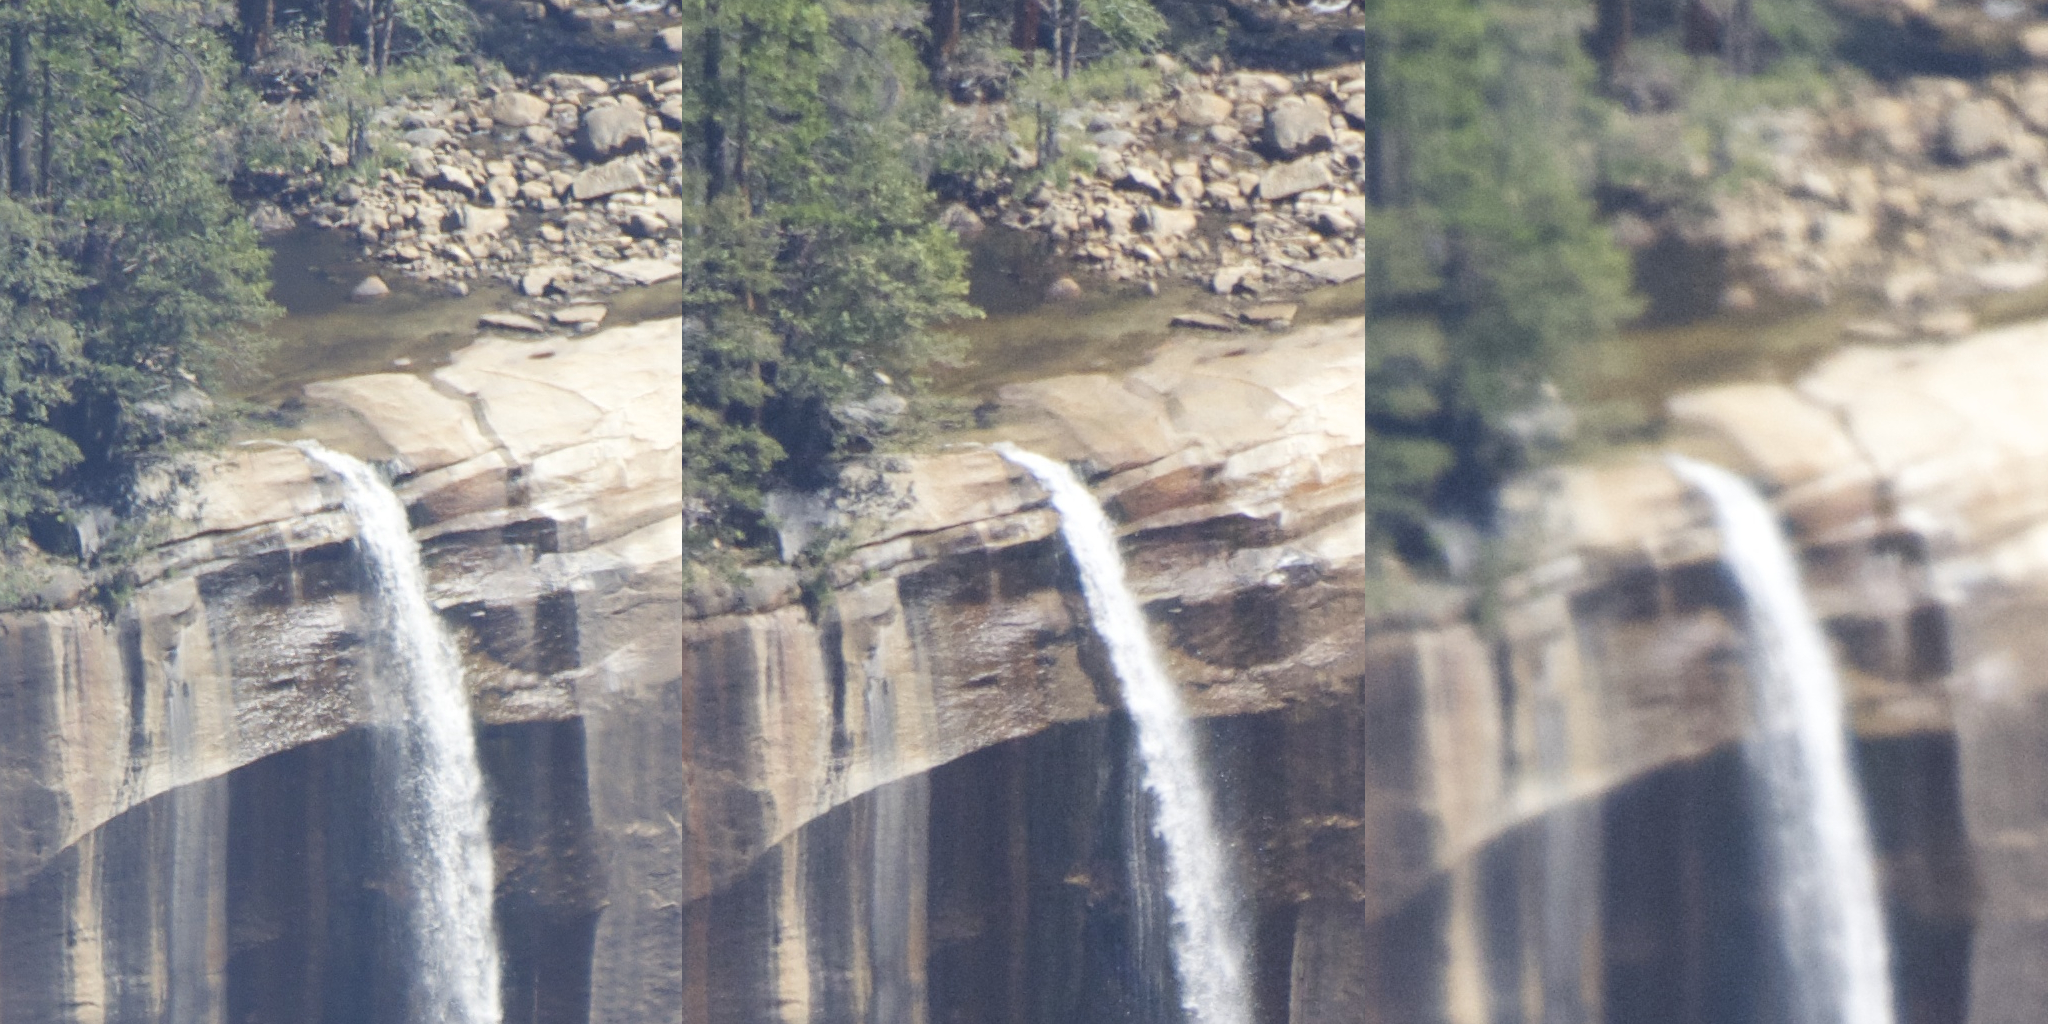
As you can see, the circular polarisers do indeed reduce the glare and improve large-scale contrast, but the ProMaster one absolutely ruins the image, while even the very expensive B+W Käsemann causes noticeable loss of acuity.
Part of the reason may be the differing ISOs – 280 vs 1100. You can see a bit of graininess in both polarised shots. That’s only part of it, though, and not a big part – two shots consistently with [or without] the filter at these two ISOs show quite little difference for a busy scene like this.
Another, and bigger, part of the reason the cheap one did so poorly is because the camera mis-focused when using it. Consistently. The camera seemed to focus as normal – just as fast, and it was just as certain it was in focus. But it wasn’t – not by quite a long shot. If you rotated the filter to its least effective position, focused, then rotated it back and took the shot, the results were a little better. Focus is about right then, but image quality is still poor. The B+W Käsemann causes systematic focus error sometimes too, requiring the same sort of shenanigans to work around.
I’m not sure why this was particularly a problem right there and then. Shooting Half Dome instead, a mere forty degrees away, showed no such issues with autofocus (though loss of acuity was still present to some degree, with both filters).
So apparently you need to be very cautious about using circular polarising filters. Cheap ones are crap. Really crap. A waste of money. Expensive ones are useful, but shouldn’t be used unless genuinely necessary – keeping in mind that the above “unfiltered” shot can be made 80% equivalent to the better filtered one by simply bumping contrast, saturation and a few other things in post. While I’m hard-pressed to see a significant difference in acuity when looking at the full photo scaled down (the first example), between no-filter and expensive-filter, you don’t have to crop it very far or view it very large to start seeing non-trivial differences.
A few notes on my method:
- I took three to five shots for each case, and picked the best ones in each set for this comparison.
- All used the same aperture (f/5.6) at the same focal length (400m) at the same shutter speed (1/640).
- Taken on a Nikon D5200 in Sport mode.
- All were hand-held albeit with VR on, and some were slightly motion-blurred, but these three best cases look fine to me in that regard.
- Aperture was used for RAW conversion.
- Full-size JPEGs are available here, here and here. Original NEFs at request.
- When I say “no filter” I technically mean “UV filter”, as this is the one lens I own where I think it’s worth protecting the front element. I haven’t done an objective evaluation of the optical effects of the UV filter, but it’s an expensive B+W one and I’ve never had reason to doubt its performance. Note that the shots with the circular polarising filters are with one or other of those instead of the UV filter, not stacked atop.
