When you tell Lightroom to deleted rejected photos, it pops up a dangerous dialog box:
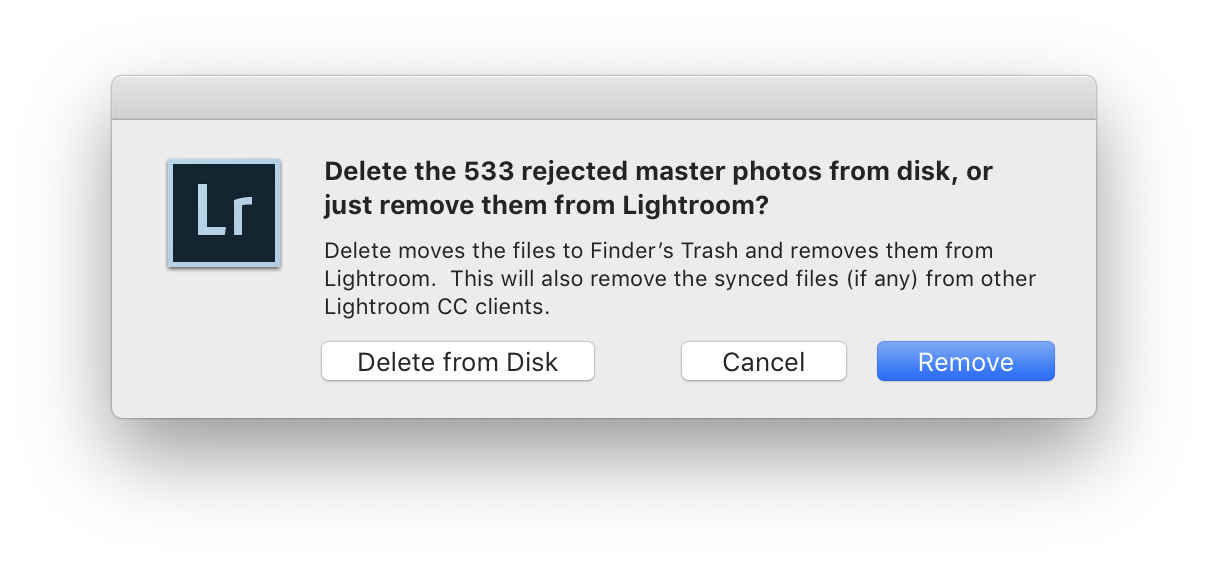
Though it does explain itself well – i.e. if you want to actually delete the photos, you need to click “Delete from Disk” – the default option is that misleading “Remove” button, which doesn’t really remove the files at all – it merely makes Lightroom lose track of them. They’ll still be there on disk, wasting space forever.
And, you can’t directly undo this operation, so if you hit return a little too quickly, or misread the dialog at any point, you’re seemingly pretty screwed (if you have a Lightroom catalog of any significant size).
Luckily, there is a way to find these undead files – that doesn’t require you walking through every single file on disk one by one & comparing against Lightroom’s view of the world.
1In the left-side panel, under the “Folders” section, select all the folders and right-click on them (if you have multiple volumes listed under “Folders”, you’ll have to do this one volume at a time as Lightroom won’t let you select folders across multiple volumes simultaneously). You’ll get a contextual menu:
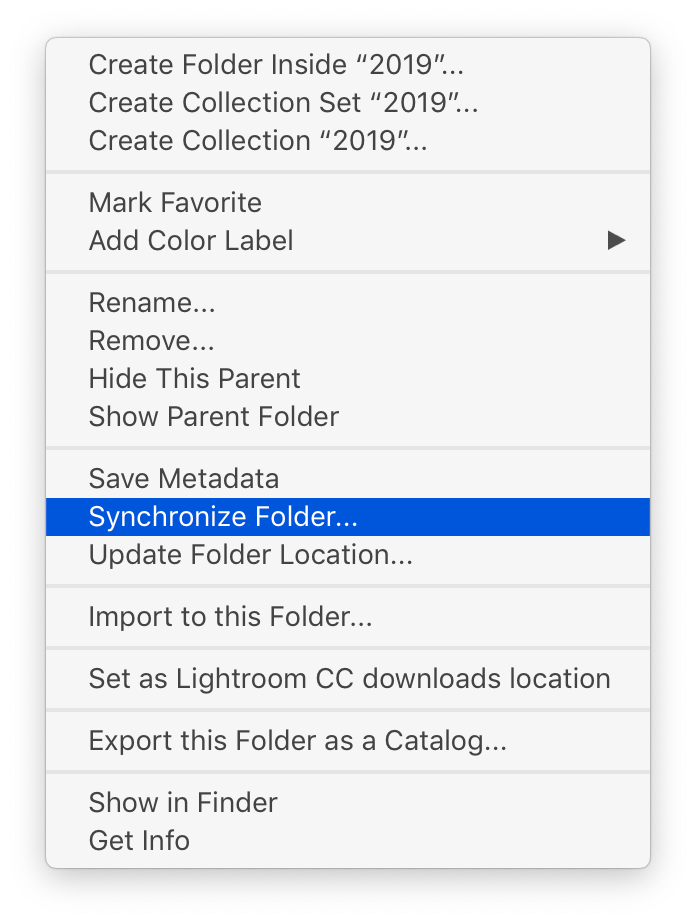
2Click “Synchronize Folder…”. A dialog will appear:
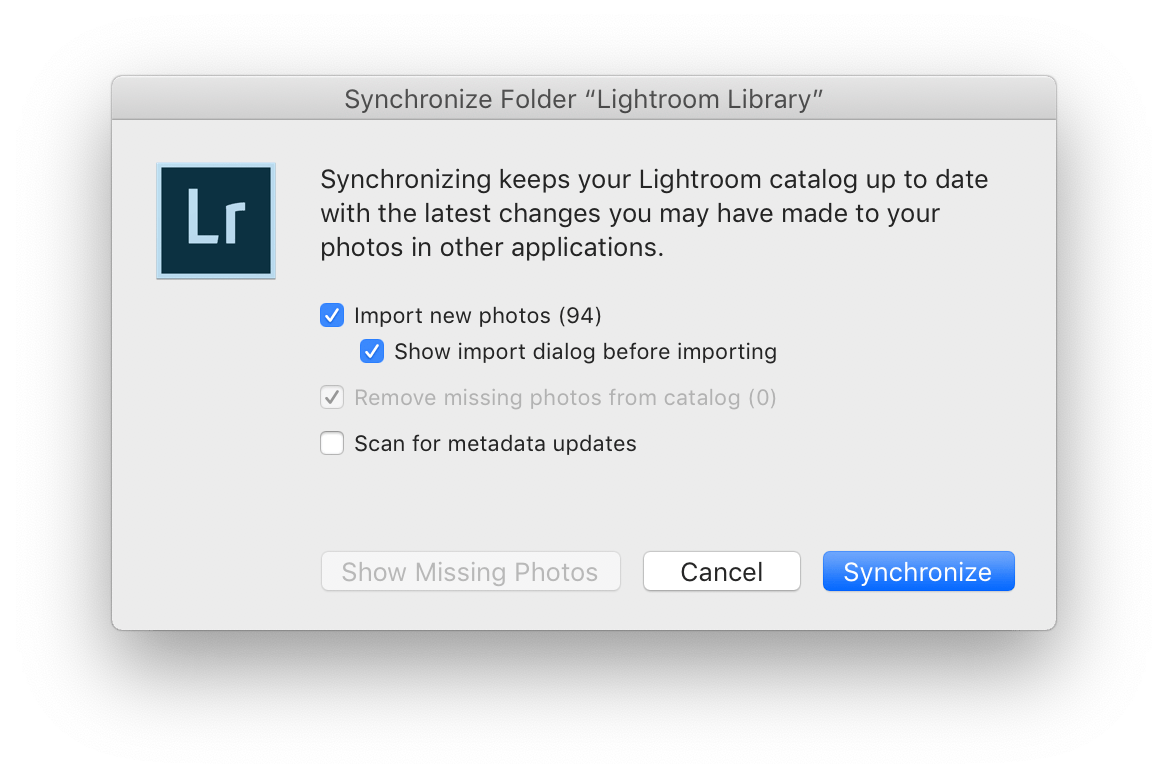
You probably want to uncheck “Remove missing photos from catalog” (if it’s not already disabled) and “Scan for metadata updates”, as those are unrelated to the purpose here and have their own ramifications. Instead, just select “Import new photos” and “Show import dialog before importing”. Then, click “Synchronize”.
3Lightroom’s standard import dialog will now appear, and will slowly sort through all the files in the folder(s) you selected, filtering them down to just those that exist on disk yet are not tracked in Lightroom – e.g. all those rejects you accidentally “Removed” but didn’t really remove previously. You can now review those and see what you’ve got – it’s possible you’ll find in there media you didn’t intend to delete, but rather were somehow misplaced by Lightroom at some point.
You might want to, in the import dialog, change your preview generation setting to ‘Minimal’ in order to minimise import time & wasted preview generation. You could also choose to add some keywords to the imports, e.g. “to be deleted” or “recovered” or “undead”, if you’re not going to just immediately delete them anyway.
In any case, you can now import some or all the undead files. Importing them might seem counter-productive, since the goal here is to delete them – but it’s necessary for the final step…
4Once they’re imported, you can now immediately mark them as rejects and delete all rejects again – this time correctly choosing “Removing from Disk”.
So while it’s a bit roundabout, it does get the job done pretty quickly and easily. Now if only Lightroom would fix that stupid dialog to make the default option the one that actually does what you told Lightroom to do to begin with. 🙄

just the post I was looking for today, thanks.